If you’re on the hunt for the perfect snack or party appetizer, look no further than Crunchwrap Sliders! These bite-sized delights bring all the flavor-packed goodness of a classic Crunchwrap but in a smaller, more convenient size. With their crispy tortilla shell, savory fillings, and gooey melted cheese, Crunchwrap Sliders are guaranteed to be a hit at any gathering.
Their versatility allows for endless customization, making them ideal for picky eaters and adventurous foodies alike. Whether you’re craving something spicy, cheesy, or packed with protein, Crunchwrap Sliders offer the ultimate snacking experience.
In this article, we’ll explore everything you need to know about Crunchwrap Sliders—from what they are and how to make them, to the best serving tips and creative variations. Let’s dive in!
Table of Contents
What Are Crunchwrap Sliders?
Crunchwrap Sliders are a scaled-down version of the popular Crunchwrap, a fast-food-inspired delight known for its crispy exterior and flavorful fillings. While traditional Crunchwraps are large, meal-sized creations, sliders offer a smaller, more portable snack option that’s perfect for parties, gatherings, or casual meals.
What sets Crunchwrap Sliders apart is their unique combination of textures and flavors. Each slider starts with a small tortilla that is stuffed with savory ingredients such as seasoned meats, melted cheese, crisp lettuce, and tangy sauces. The tortilla is folded into a compact, hexagonal shape and then cooked until golden and crispy.
How They Differ from Traditional Crunchwraps
While both are built on the same basic concept, the key differences lie in their size and versatility:
- Size: Crunchwrap Sliders are smaller and easier to handle, making them great finger food.
- Customization: Their compact size allows for more experimentation with flavors, as you can make several different variations in one batch.
- Cooking Time: Sliders cook faster due to their smaller size, making them a time-efficient option.
Crunchwrap Sliders are ideal for anyone who wants the deliciousness of a Crunchwrap in a bite-sized package. They’re a crowd-pleaser at parties and an easy way to try out new flavor combinations without committing to a full-sized wrap.
Ingredients for Making Crunchwrap Sliders
One of the reasons Crunchwrap Sliders are so popular is their adaptability. With a few core ingredients, you can create a multitude of variations to suit any taste.
Core Ingredients
To make classic Crunchwrap Sliders, you’ll need:
- Tortillas: Small, taco-sized tortillas are ideal for sliders. Look for soft, pliable options that are easy to fold.
- Fillings: Common choices include ground beef, shredded chicken, beans, or sautéed veggies.
- Cheese: Melted cheese is a must for that gooey, indulgent texture. Cheddar, Monterey Jack, or even nacho cheese work well.
- Crunch Layer: For the signature crunch, add a small tostada or tortilla chips inside.
- Sauces: From sour cream and salsa to hot sauce and guacamole, sauces bring flavor and moisture to each bite.
- Optional Add-ons: Fresh lettuce, tomatoes, jalapeños, and onions can add texture and a burst of freshness.
Variations for Dietary Needs
Crunchwrap Sliders can easily be tailored to fit specific diets:
- Vegan: Use plant-based protein (like lentils or soy crumbles), vegan cheese, and dairy-free sauces.
- Gluten-Free: Opt for gluten-free tortillas and ensure all fillings are free of gluten-containing ingredients.
- Keto-Friendly: Substitute traditional tortillas with low-carb wraps and focus on high-fat, low-carb fillings like bacon, avocado, and cheese.
Tips for Choosing the Best Ingredients
- Opt for high-quality tortillas to avoid tearing during assembly.
- Use fresh vegetables for added crunch and flavor.
- Choose sauces with a balance of spice and creaminess to enhance the overall taste.
With the right ingredients on hand, you’re ready to assemble delicious Crunchwrap Sliders. In the next section, we’ll walk you through the step-by-step process of making these delectable snacks.
Step-by-Step Guide to Making Crunchwrap Sliders

Making Crunchwrap Sliders is easier than you might think! With a little prep work and the right steps, you can create crispy, delicious sliders that everyone will love. Let’s get started!
Prepare Your Tortillas
Start by laying out your small tortillas. If they feel stiff, warm them for a few seconds in the microwave or on a pan. This makes them more flexible and easier to fold.
Pro Tip: Use taco-sized tortillas (about 6 inches). They’re perfect for sliders and hold just the right amount of filling.
Pick and Prepare Your Fillings
Next, choose your fillings. Some great options include:
- Meat: Cook ground beef with taco seasoning, shred rotisserie chicken, or sauté some shrimp.
- Veggies: Sauté onions and peppers, or keep it simple with raw lettuce and tomatoes.
- Beans: Refried or black beans add protein and creaminess.
Cook your protein and veggies ahead of time so everything is ready to assemble. Make sure your fillings are warm and well-seasoned.
Layer the Sliders
Here’s where the magic happens! Follow these steps for layering:
- Place a tortilla flat on your work surface.
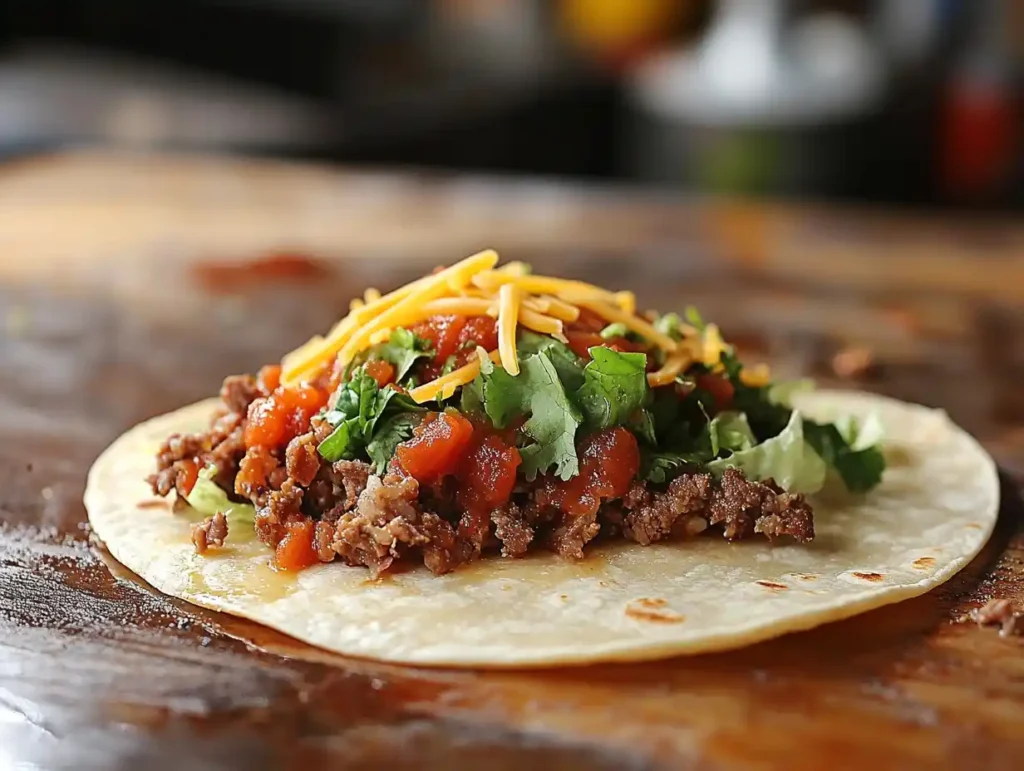
- Add a spoonful of your main filling (meat, beans, or veggies) in the center.
- Sprinkle on some cheese for gooeyness.
- Add a crunch layer—a mini tostada or a few tortilla chips.
- Top it off with sauces like sour cream, salsa, or guacamole.
Keep the portions small so the tortilla can fold around the filling.
Fold Like a Pro
To get that signature hexagonal shape:
- Start with one side of the tortilla and fold it toward the center.
- Keep folding in sections, overlapping each fold slightly, until the filling is fully enclosed.
If your tortilla is too small to close completely, add a smaller tortilla piece on top of the filling before folding.
Cook Until Crispy
Now it’s time to cook your sliders! Here are three easy methods:
- Pan-Seared: Heat a skillet over medium heat, add a little oil, and place the folded side of the slider down first. Cook for 2–3 minutes per side until golden and crispy.
- Grilled: Preheat your grill and cook the sliders on indirect heat for about 3 minutes per side.
- Baked: Place the sliders on a baking sheet and bake at 375°F (190°C) for 10–12 minutes, flipping halfway through.
Cooking Tip: Press down gently with a spatula to help the sliders crisp evenly.
Serve and Enjoy
Once they’re cooked, serve your Crunchwrap Sliders hot with your favorite dipping sauces like salsa, queso, or ranch. Arrange them on a platter to impress your guests!
With these easy steps, you’ll have a batch of sliders ready in no time. Next, let’s explore some fun and tasty variations you can try.
Popular Variations of Crunchwrap Sliders
Crunchwrap Sliders are incredibly versatile, which makes them perfect for experimenting with flavors. You can create different versions to suit any occasion or craving. Below, we’ve rounded up some of the most popular variations to try.
Mexican-Inspired Sliders
If you love bold, zesty flavors, this variation is a must-try. Start with seasoned ground beef or shredded chicken as the base. Then, layer it with black beans, shredded cheese, and a dollop of guacamole. For extra crunch, use a small tostada or a few tortilla chips.
To finish, drizzle on some spicy salsa or hot sauce before folding. When cooked, serve with sour cream or pico de gallo for dipping. This variation is perfect for Taco Tuesday or any Mexican-themed party.
Cheeseburger-Style Sliders
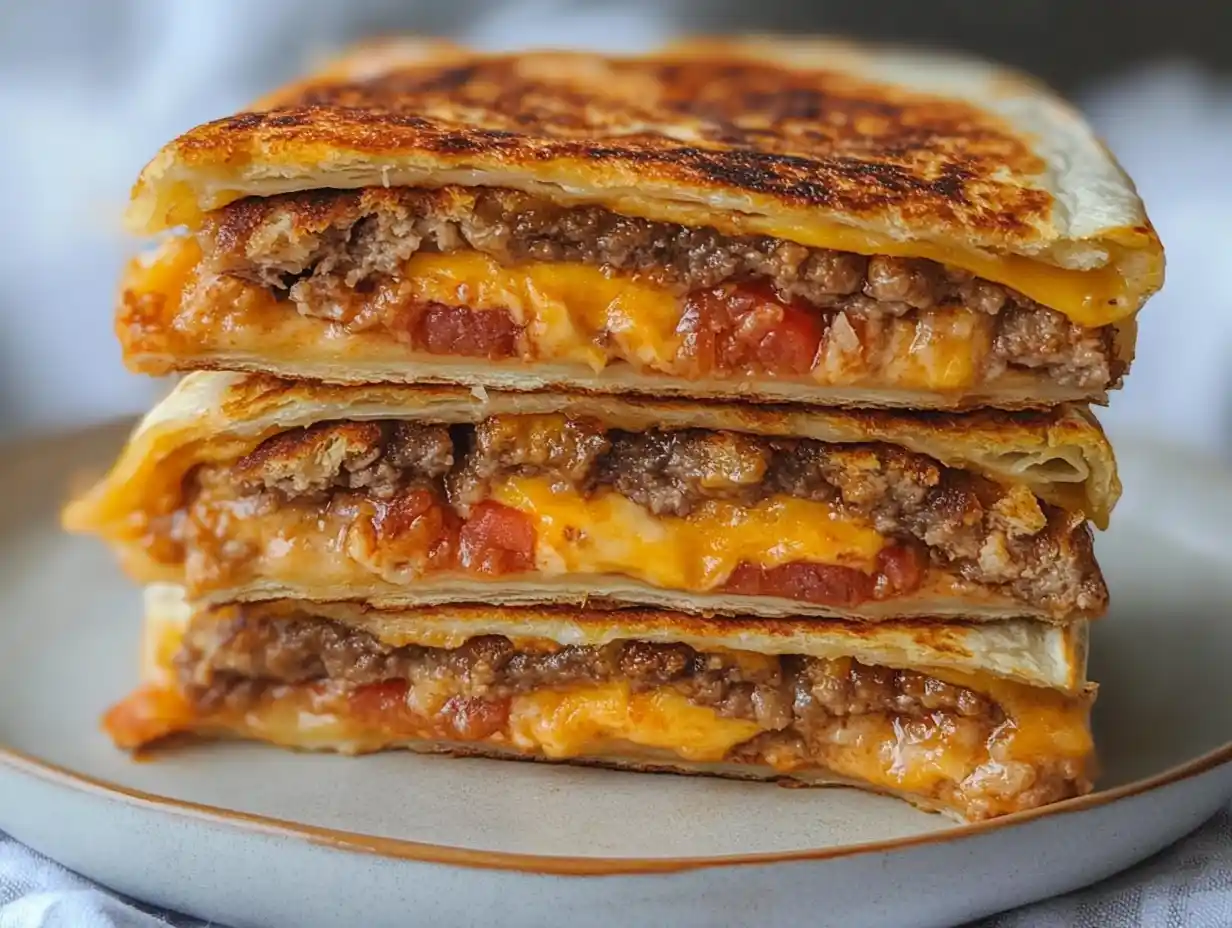
Craving a burger but want a fun twist? These Cheeseburger-Style Crunchwrap Sliders hit the spot. Use ground beef cooked with burger seasoning as the filling. Add a slice of cheddar cheese, pickles, and a drizzle of ketchup and mustard. For the crunch layer, try crispy onions or a small handful of potato chips.
After cooking, serve with a side of fries or a milkshake for the ultimate comfort meal. This version is sure to be a hit with kids and adults alike.
Breakfast Sliders

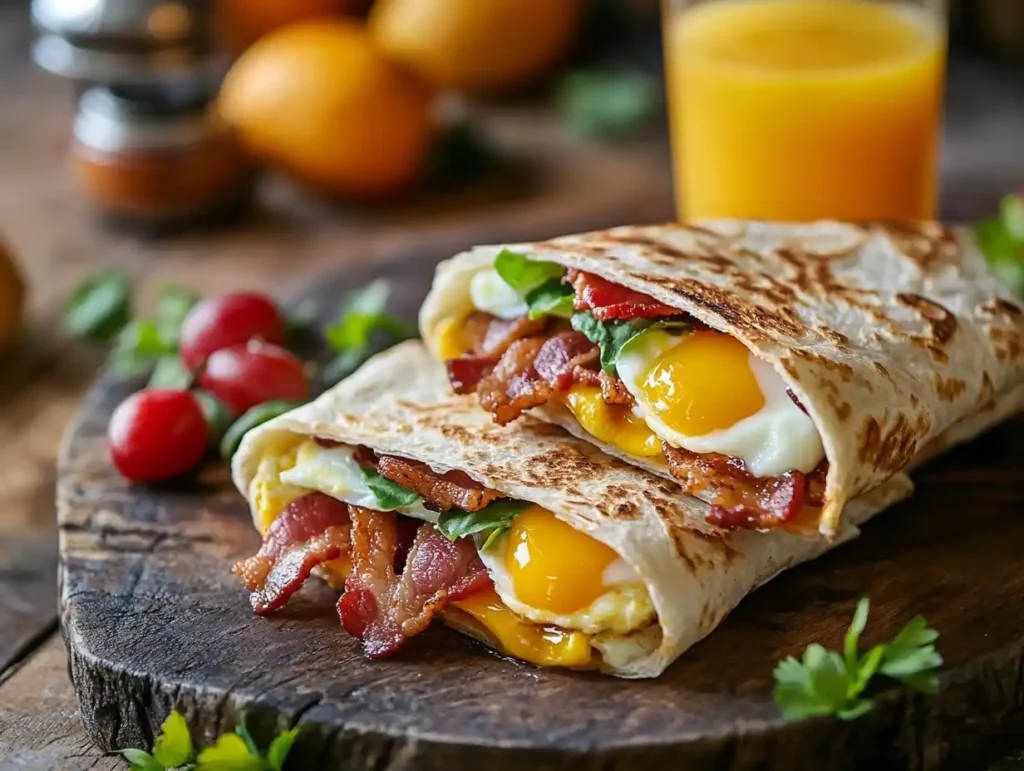
For an easy breakfast on the go, these sliders are a game changer. Start with scrambled eggs, cooked sausage or bacon, and shredded cheese. You can even add some hash browns or a slice of avocado for extra flavor and texture.
Top it all off with a drizzle of maple syrup or hot sauce before folding and cooking. Pair them with a cup of coffee or orange juice for a hearty breakfast that’s ready in minutes.
Healthy and Low-Calorie Sliders
If you’re watching your calorie intake, you don’t have to miss out on the fun. Opt for lean proteins like grilled chicken or turkey. Use whole wheat or low-carb tortillas and fill them with plenty of fresh veggies like spinach, bell peppers, and cucumbers.
For added flavor, swap traditional sauces for light Greek yogurt mixed with lemon juice and herbs. Skip the crunch layer or use baked tortilla chips to keep the calories low while still enjoying some texture.
Vegetarian or Vegan Sliders
For plant-based eaters, Crunchwrap Sliders are easy to customize. Use refried beans, sautéed mushrooms, or crumbled tofu as the main filling. Add vegan cheese, fresh veggies, and guacamole for a delicious, meat-free option.
If you’re vegan, make sure to use dairy-free tortillas and sauces. A cashew-based queso or a spicy vegan chipotle mayo works wonderfully here.
Dessert Sliders
Yes, you read that right—Crunchwrap Sliders can even be turned into dessert! Swap out savory fillings for sweet ones like Nutella, marshmallows, and banana slices. For a crunchy layer, use graham crackers or crushed cookies.
After cooking, dust the sliders with powdered sugar or drizzle them with caramel or chocolate sauce. These sweet treats are great for kids’ parties or as a unique dessert option.
Tips for Perfect Crunchwrap Sliders
While Crunchwrap Sliders are easy to make, a few clever tricks can ensure they turn out crispy, flavorful, and irresistible every single time. Whether you’re a beginner or an experienced cook, these tips will help you elevate your sliders.
Keep Your Sliders Crispy
To start, ensuring the sliders stay crispy is key to enjoying that satisfying crunch. First, make sure your tortillas are dry before adding the fillings. Excess moisture can make the tortilla soggy during cooking.
Next, always cook the folded side down first. This helps seal the edges securely and prevents the filling from spilling out. Additionally, using a non-stick skillet or lightly greasing your pan will prevent the tortillas from sticking.
Fold Like a Pro
Folding the tortilla properly is essential for keeping everything intact. Begin by gently pressing down the filling to create a compact shape. Then, fold one side toward the center, followed by the remaining edges, overlapping slightly as you go.
If your tortilla doesn’t fully enclose the filling, don’t worry! Simply add a small tortilla piece on top of the filling before folding. This extra layer acts as a seal and prevents leaks during cooking.
Balance Your Flavors
When it comes to flavor, balance is everything. To start, pair bold, seasoned fillings like spiced ground beef with creamy sauces such as sour cream or guacamole. This creates a mix of textures and tastes that complement each other.
Moreover, don’t forget to taste-test your fillings before assembling the sliders. Adjust the seasoning by adding a pinch of salt, a dash of hot sauce, or a squeeze of lime juice to brighten the flavors.
Choose the Right Cheese
Cheese is a star ingredient in Crunchwrap Sliders, so it’s important to choose wisely. For a gooey, melty texture, go for cheeses like Monterey Jack, cheddar, or mozzarella. However, if you prefer a spicier kick, pepper jack is a great option.
To enhance the flavor further, shred your cheese at home rather than using pre-shredded cheese. Freshly shredded cheese melts more evenly and tastes better.
Avoid Overfilling
It can be tempting to load up your sliders with lots of fillings, but less is more when it comes to achieving the perfect fold. Overfilling makes it harder to seal the tortilla and can cause the slider to fall apart during cooking.
Instead, use small portions of each ingredient, focusing on creating a balance of flavors and textures in every bite. Remember, the crunch layer will add volume, so plan your portions accordingly.
Store and Reheat Like a Pro
If you have leftovers, storing and reheating them properly is crucial for maintaining their texture. Place cooked sliders in an airtight container and refrigerate them for up to three days.
When you’re ready to reheat, avoid the microwave, as it can make the tortilla soggy. Instead, reheat the sliders in a skillet over medium heat for a few minutes on each side. This will restore their crispiness while warming the fillings.
Add Finishing Touches
Finally, don’t underestimate the power of garnishes and sides. Sprinkle some chopped cilantro or green onions on top of your sliders for a burst of freshness. For extra flavor, serve them with dips like salsa, queso, or chipotle mayo on the side.
By following these tips, you’ll make Crunchwrap Sliders that look and taste like they came straight from a restaurant. Now that you know how to perfect them, let’s talk about how to serve these sliders for maximum enjoyment.
FAQs
Can Crunchwrap Sliders Be Made Ahead of Time?
Yes, you can assemble them in advance and store them in the fridge for up to 24 hours. Cook them fresh when ready to serve to keep the tortillas crispy.
What Are the Best Tortillas to Use?
Small, soft flour tortillas work best as they’re easy to fold without tearing. For a healthier twist, use whole wheat or low-carb options.
Are There Vegan Options?
Definitely! Swap meat for beans or plant-based protein, use vegan cheese, and opt for dairy-free sauces.
Can I Freeze Crunchwrap Sliders?
Yes, cooked sliders can be frozen. Wrap them individually and store them in a freezer-safe container for up to 2 months. Reheat in the oven to maintain their crispiness.
What’s the Best Sauce to Serve?
Sour cream, guacamole, and queso are classics. For a spicy kick, try salsa or chipotle mayo. Offering a variety ensures everyone finds a favorite.
Conclusion
Crunchwrap Sliders are the perfect blend of crispy, flavorful, and customizable, making them a standout option for snacks, parties, or even casual meals. With endless variations to explore, from Mexican-inspired to breakfast-friendly options, there’s a version for everyone to enjoy.
By following the simple steps outlined in this guide and using the tips provided, you can create sliders that are both delicious and visually impressive. So, gather your ingredients, start experimenting, and get ready to share these tasty treats with friends and family—they’re guaranteed to be a hit!
For more tasty recipes, check out our Mini Pancakes Recipe or learn about Sourdough Garlic Bread. If you’re a fan of Tex-Mex, you might also enjoy Jambalaya with Cheese

