Introduction
Are you wondering how to fold salami for charcuterie skewers to create stunning appetizers? Charcuterie skewers are a popular choice for parties and gatherings because they are easy to prepare, visually appealing, and incredibly versatile. Using folded salami adds elegance and texture, making your skewers stand out while complementing other ingredients like cheese, fruits, and vegetables.
In this guide, we’ll explain how to fold salami for charcuterie skewers step-by-step, covering different folding techniques and tips for assembly. By the end, you’ll know exactly how to make beautiful skewers that impress your guests.
Preparing Salami for Folding
Choosing the Right Type of Salami
Not all salami is created equal, and the type you choose can affect the ease of folding and the final look of your skewers.
- Thinly Sliced Salami – Ideal for delicate folds like rosettes or accordion shapes.
- Thicker-Cut Salami – Works well for simpler folds, such as half-moons or roll-ups.
- Pre-Sliced Salami – Convenient and uniform in size, making it perfect for quick assembly.
- Dry-Cured Salami – Holds its shape better than softer varieties, providing durability for folding.
- Tip: Opt for 2–3 varieties of salami, such as Genoa, Soppressata, or Calabrese, to add visual interest and flavor diversity.
Tools You’ll Need to Prepare Salami Skewers
To make assembling skewers simple and mess-free, gather the following tools:
- Wooden or Metal Skewers – Choose food-safe skewers that are sturdy enough to hold multiple ingredients.
- Sharp Knife or Scissors – Use these to trim any uneven edges for a clean finish.
- Cutting Board – Provides a clean and stable surface for slicing.
- Small Bowls – Great for organizing ingredients before assembly.
Slicing Techniques for Uniform Pieces
Even if you’re working with pre-sliced salami, it’s essential to ensure each piece is evenly sized.
- Tip: For thicker slices, gently flatten them with your hands to make folding easier.
- Pro Tip: Stack multiple slices and cut them at once to save time while keeping consistency.
Different Ways to Fold Salami for Skewers
The Simple Fold: Half-Moon Shape
- How to Fold:
- Lay a slice of salami flat.
- Fold it in half to create a semi-circle shape.
- Stack multiple half-moons onto the skewer, overlapping slightly.
- Why It Works: This fold is quick and creates a clean, layered look that pairs well with cheese and olives.
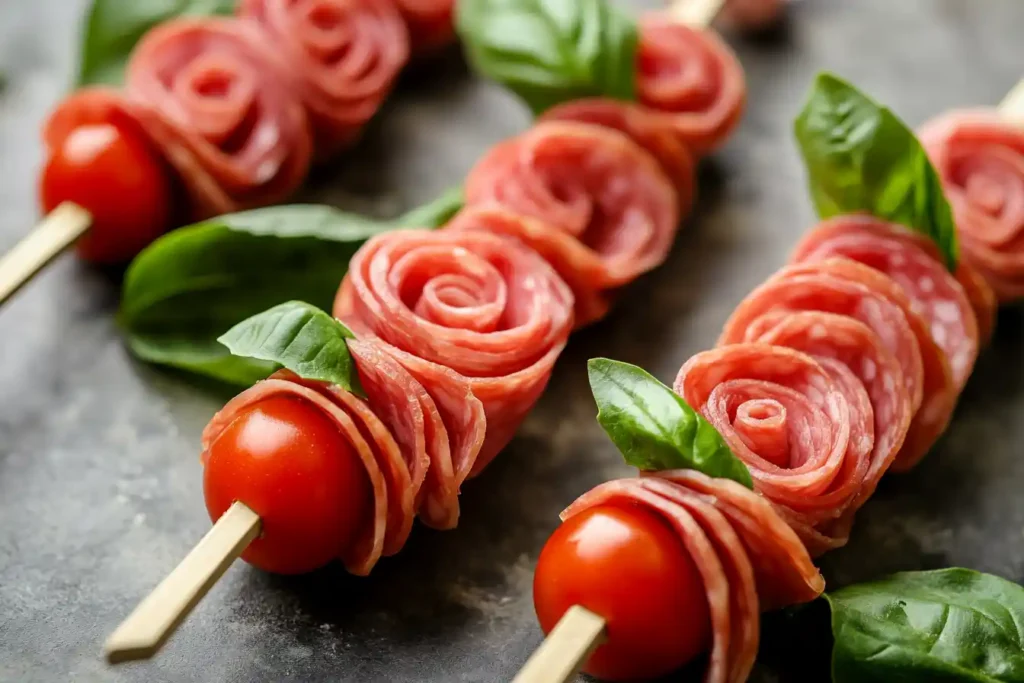
The Rosette Fold: Flower-Like Presentation

- How to Fold:
- Fold a slice of salami in half.
- Roll it tightly from one end to the other to form a rose shape.
- Thread the base of the rosette onto the skewer to hold its form.
- Why It Works: This elegant design is perfect for impressing guests and creating a floral centerpiece on your skewer.
The Accordion Fold: Elegant and Compact Layers
- How to Fold:
- Fold the salami slice back and forth, like an accordion or fan.
- Pinch the folded slice in the center and slide it onto the skewer.
- Why It Works: This fold adds height and texture, making the skewer look more dynamic and full.
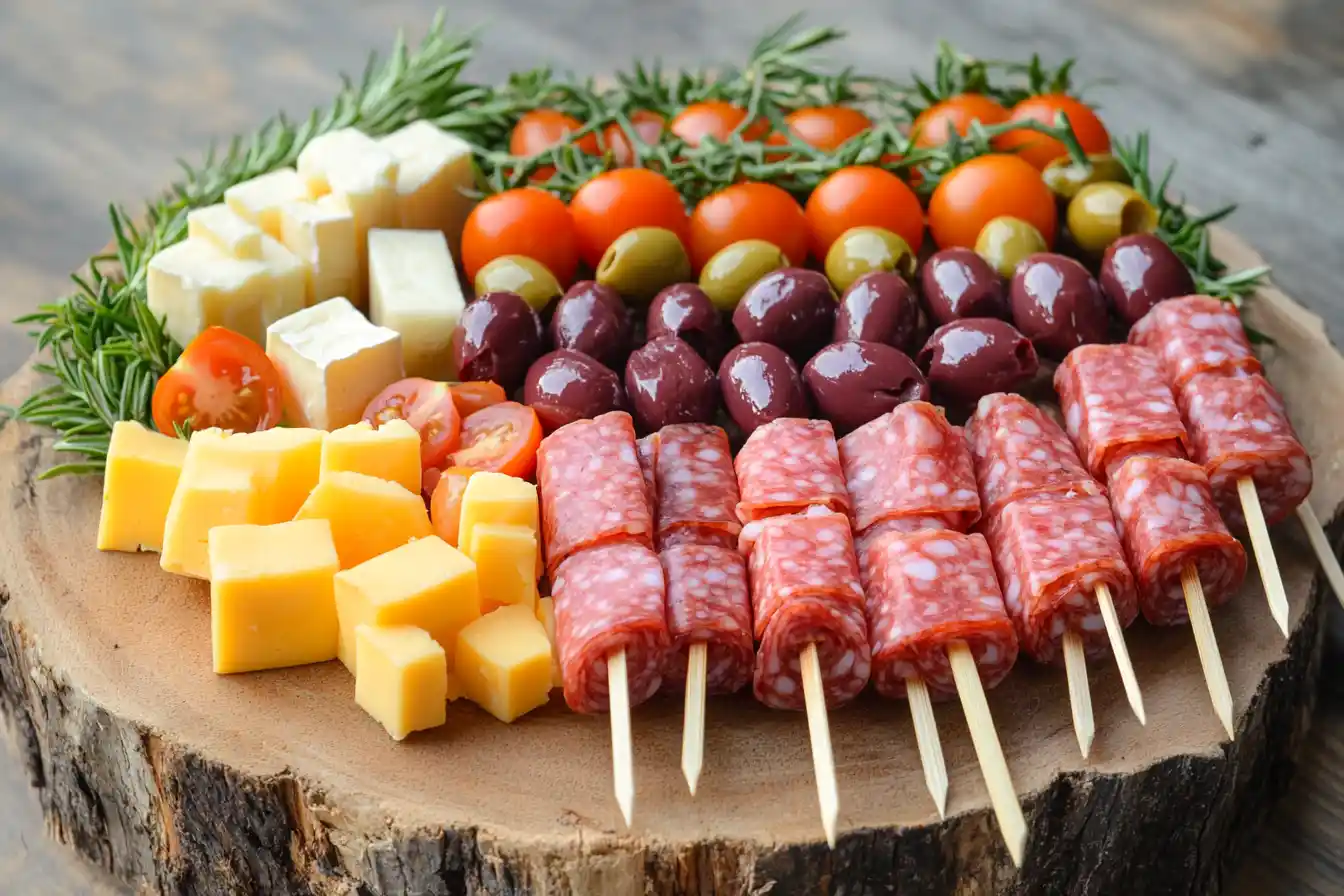
The Roll-Up Fold: Classic and Quick Design
- How to Fold:
- Roll each slice of salami tightly into a cylindrical shape.
- Slide the rolled salami directly onto the skewer.
- Why It Works: This method is fast, keeps ingredients compact, and is great for pairing with cheese cubes or cherry tomatoes.
Step-by-Step Guide to Assemble Charcuterie Skewers

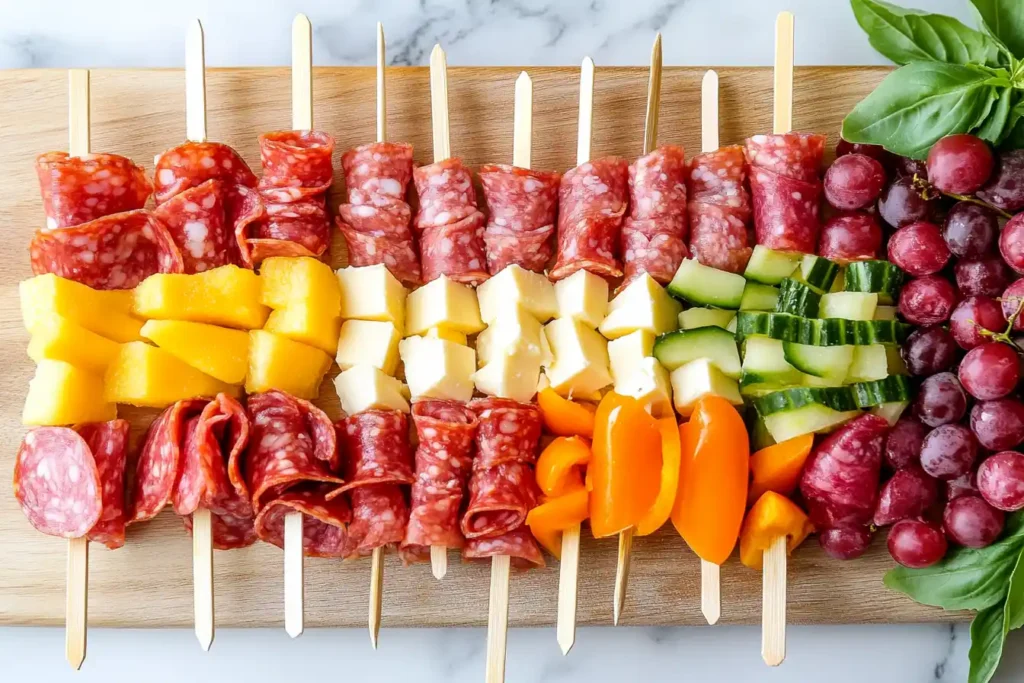
Layering Salami with Cheese, Fruits, and Vegetables
Now that you’ve folded the salami, it’s time to assemble your charcuterie skewers. The key is to balance flavors, textures, and colors to make them both tasty and visually appealing.
1: Start with a Base Ingredient
- Begin by threading a sturdy ingredient, like a grape or a cheese cube, onto the skewer. This provides a stable foundation and keeps other ingredients from sliding down.
2: Add a Folded Salami Slice
- Insert one of the folded salami pieces, such as a half-moon or accordion fold, onto the skewer. Make sure the fold is secure and doesn’t unravel.
3: Alternate with Complementary Ingredients
- Follow up with contrasting items, like a cherry tomato, mozzarella ball, or olive. This creates a balance of flavors and textures.
4: Repeat the Layers
- Continue alternating salami folds and other ingredients until the skewer is full. Leave a little space at the end for easy handling.
5: Finish with a Decorative Top
- End with something visually striking, such as a small basil leaf, an olive, or a decorative pick.
Balancing Colors and Textures for Visual Appea
To make your skewers visually appealing, it’s essential to mix colors and textures.
- Color Combos: Pair red cherry tomatoes, green olives, and creamy white cheeses for contrast.
- Texture Balance: Use crunchy elements like nuts or breadsticks to complement the soft texture of salami and cheeses.
- Pro Tip: Arrange the skewers in a circular or layered pattern on a serving tray to create a polished presentation.
Securing Skewers for Easy Serving
- Tip 1: Use sturdy skewers that won’t bend or break when loaded with ingredients.
- Tip 2: If using wooden skewers, soak them in water for 10 minutes before assembling to prevent splintering.
- Tip 3: Arrange skewers upright in a jar or flat on a tray lined with parchment paper to keep them stable.
Tips for Storing and Serving Salami Skewers
Keeping Skewers Fresh Before Serving
If you’re making skewers ahead of time, proper storage is crucial to maintain freshness.
- Refrigerate Skewers: Cover the tray with plastic wrap or store skewers in airtight containers to prevent drying out.
- Chill Ingredients Separately: If making them hours before serving, keep ingredients chilled separately and assemble them just before the event.
- Pro Tip: Add fresh herbs or a drizzle of olive oil right before serving to enhance aroma and flavor.
Preventing Dryness and Preserving Flavor
Salami can dry out if left uncovered, so it’s important to protect it.
- Tip 1: Lightly brush salami with olive oil to keep it moist.
- Tip 2: Avoid leaving skewers out for more than 2 hours to maintain freshness and food safety.
- Tip 3: Serve with small bowls of dips or spreads to add moisture and flavor without making the skewers soggy.
Creative Presentation Ideas for Parties
The way you display your skewers can make them even more inviting.
- Rustic Boards: Arrange skewers on a wooden cutting board for a natural, rustic look.
- Vertical Displays: Use tall glasses or jars to stand skewers upright for a modern touch.
- Layered Patterns: Arrange them in concentric circles or rows to make the display look organized and eye-catching.
- Tip: Garnish with sprigs of rosemary or basil to add a finishing touch that complements the flavors.
Common Mistakes to Avoid
Using Too Much Salami on a Single Skewer
Adding too much salami can make skewers bulky and unbalanced. Instead, aim for 2–3 folded slices per skewer to create an appealing look without overwhelming the other ingredients. This keeps the presentation clean while allowing space for complementary flavors like cheese and fruits.
Not Spacing Ingredients Evenly
Uneven spacing can make skewers look messy and unorganized. To prevent this, alternate ingredients evenly and leave small gaps between layers to ensure each bite is visually appealing and easy to eat. Furthermore, arranging ingredients in a consistent pattern improves the overall design of the skewer.
Forgetting to Use Food-Safe Skewers
Choosing the wrong skewers can lead to splintering or instability. Always opt for smooth, food-safe wooden or stainless-steel skewers. If you plan to prepare skewers in advance, soaking wooden skewers in water helps prevent splintering and maintains durability.
Health and Dietary Considerations
Choosing Low-Sodium or Uncured Salami Options
For guests who prefer healthier options, selecting low-sodium or uncured salami is a great choice. These alternatives reduce salt intake while maintaining rich flavors. Additionally, they often contain fewer preservatives, making them a better fit for health-conscious individuals.
Alternatives for Vegetarian and Vegan Guests
It’s important to accommodate all dietary preferences. You can replace salami with plant-based deli slices, grilled vegetables, or marinated tofu. Adding olives, roasted peppers, and hummus ensures there are tasty alternatives for everyone.
Pairing Salami with Nutrient-Rich Ingredients
To create a balanced skewer, pair salami with nutrient-dense items like fresh fruits, nuts, and cheeses high in protein. For example, pairing it with antioxidant-rich grapes or fiber-packed figs boosts both flavor and nutrition.
Frequently Asked Questions (FAQs)
1. Can I make charcuterie skewers ahead of time?
Yes, charcuterie skewers can be prepared up to 24 hours in advance. Simply wrap them tightly in plastic wrap and store them in the refrigerator until serving time.
2. What’s the best size for skewers?
For appetizers, 6–8-inch skewers work best. They’re long enough to hold multiple ingredients but still easy to handle. If you need larger portions, you can use 10-inch skewers.
3. How do I keep salami from falling off the skewers?
To secure the salami, fold it tightly and thread it through the center. If necessary, stack multiple folds together before adding other ingredients to hold them in place.
4. Can I use different types of cured meats for skewers?
Absolutely! Mixing meats like prosciutto, chorizo, and pepperoni adds variety and enhances flavor combinations. Just be sure to fold each meat type uniformly for a cohesive look.
5. What cheeses pair best with salami on skewers?
Popular pairings include mozzarella balls, cheddar cubes, and gouda slices. These cheeses complement the saltiness of salami and hold their shape well on skewers.
6. How do I arrange skewers to make them look professional?
Consider displaying skewers in neat rows on a wooden board or standing them upright in glass jars for added height. Garnish with rosemary or basil for an extra decorative touch.
Conclusion
Folding salami for charcuterie skewers doesn’t just enhance visual appeal—it also adds structure and balance to your appetizer display. By learning different folding techniques, such as the rosette or accordion fold, you can easily create a variety of textures and styles to impress your guests.
In addition, proper assembly techniques ensure that skewers are neat, colorful, and easy to handle. Remember to alternate ingredients thoughtfully, use sturdy skewers, and store them properly to keep everything fresh.
Whether you’re hosting a casual get-together or a formal party, charcuterie skewers are versatile, delicious, and simple to prepare. So, gather your ingredients, practice these folding techniques, and build a show-stopping charcuterie display that everyone will enjoy!
Love charcuterie ideas? Explore our guide on Charcuterie Skewers for creative serving tips. Learn more about What Not to Put on a Charcuterie Board to avoid common mistakes. Need dips? Try our delicious Honey Garlic Sauce recipe to complement your skewers.

