People have baked sourdough bread for centuries because of its rich taste, soft texture, and health benefits. Baking sourdough can be a fun and rewarding process, but it comes with challenges. To succeed, you need to care for your live starter and follow the steps carefully.
Even skilled bakers often make mistakes that lead to disappointing results. Neglecting your starter, mismanaging fermentation, or baking at the wrong temperature can undo your efforts. This guide explains the most common mistakes in sourdough baking and shows how you can avoid them.
If you’re just starting or looking to improve your skills, this article will help you bake better sourdough bread.
Neglecting Your Sourdough Starter

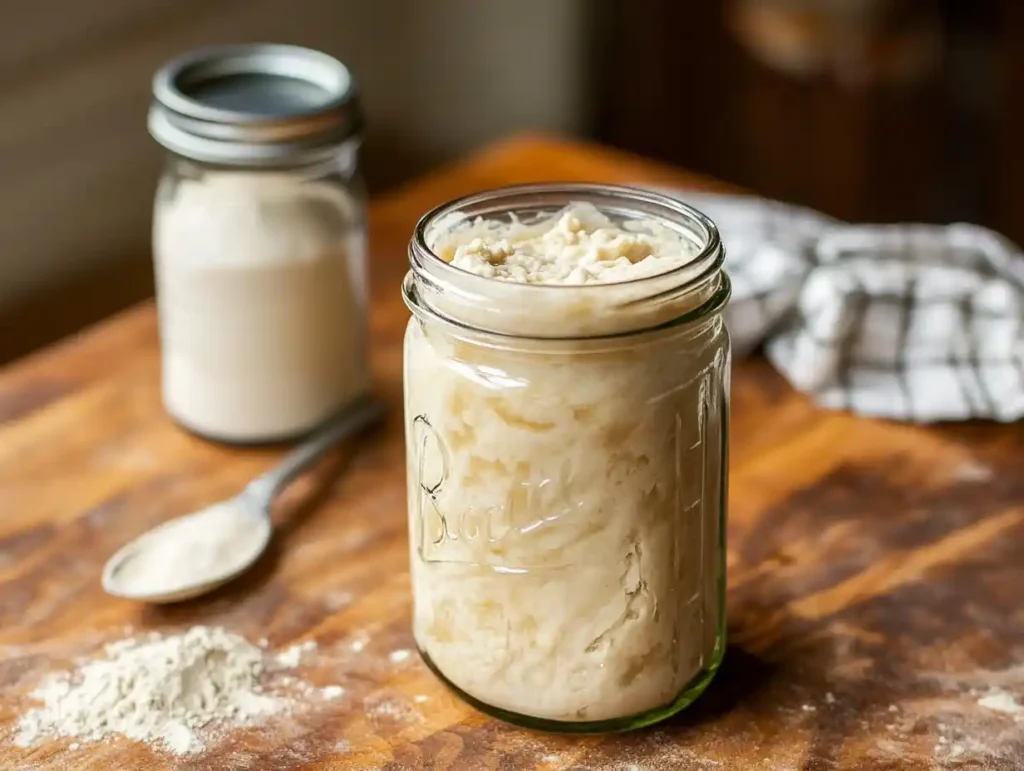
The sourdough starter is the heart of your bread-making process. It’s a live culture of flour and water, home to wild yeast and bacteria that help your dough rise and give it that signature tangy flavor. Without proper care, your starter can become weak or die, making it impossible to bake good bread. Here’s what you should avoid when handling your starter.
Forgetting to Feed Your Starter
Your sourdough starter relies on regular feedings to stay active. If you forget to feed it, the wild yeast and bacteria inside may starve, lose their strength, or even die. Feed your starter at least once daily when it’s at room temperature and every 7–10 days if stored in the fridge. If it develops a strange smell, discolored liquid, or mold, it might be time to discard and start fresh.
Using Unfiltered Water or Improper Flour
The quality of the ingredients you use directly affects your starter’s health. Chlorinated tap water can harm the beneficial microbes in your starter. Always use filtered or distilled water. Similarly, not all flours are equally nourishing for your starter. Opt for unbleached, whole-grain, or organic flours to provide essential nutrients.
Overfeeding or Underfeeding Your Starter
Striking the right feeding balance is essential. Overfeeding your starter dilutes its activity and makes it sluggish, while underfeeding leaves it hungry and weak. Follow a consistent ratio of starter, flour, and water (like 1:1:1 by weight) to maintain its strength. Keep an eye on how quickly it bubbles and rises, as this indicates its health.
Mishandling the Fermentation Process

Fermentation is a critical step in sourdough baking. During this phase, the dough develops flavor, structure, and elasticity. Mistakes during fermentation can lead to bread that is dense, overly sour, or lacking in flavor. Let’s explore some common errors.
Over-Proofing: Letting the Dough Rise Too Long
When you leave your dough to rise for too long, the gluten structure breaks down, and the dough loses its strength. Over-proofed dough often collapses and results in flat, overly sour bread. Pay close attention to your dough’s size and texture to avoid this issue. When it doubles in size and holds a slight indentation when pressed, it’s ready for the next step.
Under-Proofing: Cutting the Process Short
On the flip side, if you rush fermentation, your dough won’t develop enough flavor or structure. Under-proofed dough is tight, heavy, and hard to shape. Allow enough time for the fermentation process—typically 4–6 hours at room temperature or overnight in the fridge. Check for signs like a puffy appearance and visible air bubbles to confirm it’s ready.
Ignoring Temperature Control
Temperature plays a huge role in how your dough ferments. Too much warmth can cause over-proofing, while a cold environment slows down fermentation. Aim for a steady room temperature of 70–75°F (21–24°C). Adjust the fermentation time based on your kitchen’s conditions to keep the process on track.
Failing to Monitor Hydration Levels
The water-to-flour ratio in your dough (known as hydration) impacts its texture and rise. Too much water makes the dough sticky and hard to handle, while too little water leads to a dry, crumbly loaf. Stick to the recipe’s hydration level, and use a kitchen scale to measure accurately. Fine-tuning hydration helps you create dough with the right balance of stretch and strength.
Using Incorrect Ingredients
The ingredients you choose play a major role in the quality of your sourdough bread. Even small changes can affect the taste, texture, and rise of your loaf. Here’s what to avoid when selecting and using ingredients.
Substituting the Wrong Types of Flour
Not all flours are created equal. Sourdough recipes often call for specific flours like bread flour, all-purpose flour, or whole wheat flour. Substituting with alternative flours, like almond or coconut flour, can disrupt gluten development and result in a dense, poorly-risen loaf. Stick to flours that are suitable for bread-making unless the recipe suggests otherwise.
Adding Too Much Sugar, Salt, or Fat
While some sourdough recipes include sugar, salt, or fat for added flavor, using too much can interfere with the fermentation process. Excess sugar feeds the yeast too quickly, leading to over-proofing, while too much salt can kill the yeast entirely. Large amounts of fat, like butter or oil, can weigh down the dough. Always measure these ingredients carefully and follow the recipe.
Using Expired or Low-Quality Ingredients
Fresh, high-quality ingredients are key to great sourdough. Old or expired flour can lose its nutrients, while stale yeast can weaken the starter. Similarly, poor-quality ingredients may introduce unwanted flavors or textures. Invest in good flour and check the freshness of all your ingredients before starting.
Poor Kneading Techniques
Kneading dough helps develop gluten, the protein structure that gives bread its elasticity and rise. If done incorrectly, kneading can ruin your dough before it even gets to the fermentation stage. Here’s how to avoid common kneading mistakes.
Over-Kneading or Under-Kneading
Both over-kneading and under-kneading can harm your dough. Over-kneading breaks down the gluten network, making the bread dense and chewy. Under-kneading leaves the dough weak and unable to trap gas from fermentation. To strike the right balance, knead the dough until it feels smooth, elastic, and slightly tacky.
Neglecting to Develop Gluten Properly
Gluten development isn’t just about kneading—it also depends on rest periods like autolyse (letting flour and water sit before adding other ingredients) and stretch-and-fold techniques. Skipping these steps can leave your dough lacking strength. Incorporate these practices into your routine for a better rise and texture.
Using Tools That Damage the Dough
Some tools, like dull scrapers or heavy rolling pins, can harm the structure of your dough. Avoid flattening or tearing the dough during handling. Instead, use gentle, precise movements and proper tools like a bench scraper or your hands to shape and work the dough.
Ignoring Proper Baking Techniques
The baking stage is where all your hard work comes together. Unfortunately, poor baking practices can ruin an otherwise perfect loaf. Let’s discuss some mistakes to avoid when putting your sourdough in the oven.
Not Preheating the Oven Adequately
Sourdough needs a very hot oven to get a good rise and crust. Failing to preheat your oven to the right temperature can result in a dense loaf with a pale crust. Preheat the oven for at least 30 minutes before baking, and ensure the temperature matches your recipe’s instructions.
Skipping Steam During Baking
Steam is essential for a shiny crust and proper oven spring (the rise of the bread in the oven). If you skip this step, your bread may turn out flat with a dull crust. Create steam by adding a tray of hot water to the oven or using a covered Dutch oven to trap moisture.
Baking at the Wrong Temperature or Time
Too much heat can burn the crust while leaving the inside raw, and too little heat can result in undercooked, dense bread. Follow the baking time and temperature in your recipe closely, and use an oven thermometer to ensure accuracy. For best results, check the internal temperature of your loaf—it should read 190–210°F (88–99°C) when fully baked.
Using Improper Baking Vessels
The baking vessel you choose affects the shape, crust, and even heat distribution of your loaf. Using a thin baking sheet or pan can cause uneven baking. Opt for a Dutch oven, cast-iron skillet, or a pizza stone for the best results. These tools retain heat well and help create the ideal environment for your bread.
FAQs About Sourdough Pitfalls
Making sourdough is a journey, and questions often arise when things don’t go as planned. In this section, we’ll address some of the most common sourdough-related questions to help you avoid mistakes and troubleshoot issues.
How Can I Tell If My Sourdough Starter Is Dead?
A dead starter stops bubbling, has an unpleasant smell, and shows no signs of rising after feedings. To check if it’s still alive, feed it with equal parts flour and water. If it doesn’t show any activity within 24 hours, it’s likely dead. However, in most cases, starters can be revived with consistent care and feedings.
What Happens If I Over-Proof My Dough?
Over-proofed dough becomes weak and loses its ability to hold shape. When baked, it often results in a flat loaf with a sour flavor. To avoid over-proofing, keep track of time, monitor the dough’s size, and use the poke test—if a gentle press leaves a deep indentation that doesn’t spring back, it’s likely over-proofed.
Can Sourdough Be Salvaged If It’s Too Sour?
Overly sour sourdough often occurs when the starter is neglected or the dough ferments too long. To balance the flavor, reduce the fermentation time or feed the starter more frequently to refresh it. You can also adjust the recipe to include less starter or add sweet ingredients like honey or milk to mellow the sourness.
Why Is My Sourdough Bread Too Dense?
Dense bread is often the result of under-proofing, weak gluten development, or incorrect hydration levels. Check that your dough has risen adequately before baking, and make sure your starter is active and bubbly before use. Proper kneading and hydration also play a key role in creating a light and airy loaf.
Is It Okay to Store Starter in the Refrigerator Long-Term?
Yes, you can store your starter in the fridge to slow its activity, but don’t forget about it completely. Feed it at least once every 7–10 days to keep it alive and healthy. If you plan to bake, bring the starter to room temperature and give it a few feedings to reactivate it.
What Tools Should I Avoid When Making Sourdough?
Avoid using tools that can harm your dough or disrupt the baking process. For instance, dull knives or weak bench scrapers can tear the dough, while thin baking sheets lead to uneven heat distribution. Stick to high-quality, durable tools like a sharp scoring blade, a sturdy scraper, and a Dutch oven or baking stone.
Conclusion
Making sourdough is as much about avoiding mistakes as it is about perfecting techniques. By caring for your starter, handling the dough properly, and baking with the right tools, you can create delicious bread every time. Remember, practice and patience are key to mastering sourdough. Each mistake teaches you something new, so don’t be discouraged. Embrace the process, learn from your experiences, and enjoy the rewards of homemade sourdough.
For more inspiration, check out our Sourdough Garlic Bread recipe. Curious about pairing options? Explore What is the Best Combination for Garlic Bread. Looking for other baking tips? Discover Why Are Restaurant Pancakes So Fluffy to level up your cooking!

